-
How To Lay A Tile Floor
 Share on Facebook
February 22, 2017
Laying a new tile floor is well within the scope of most people, however a successful job requires careful preparation, an understanding of how the various tasks are properly done, and a strong ability to pay attention to every detail.
MATERIALS AND TOOLS
You’re going to need a chalk line, level, tape measure, grout float, wet saw, tile spacers, notched trowel, sponge, grout, thinset, tile underlayment, grout release agent, tile and grout sealer, and of course tiles
PREPPING THE SUBSTRATE
There are many types of floor tile, ranging from ceramics to clay to natural stone, and most can be successfully installed over various types of substrates, including existing tile, a mortar base, plywood sub-flooring or cement board.
If you lay new tile over old tile, the original tile and grout must be securely attached. Use a patching compound to fill in broken or missing tiles and any spaces in the old grout. Scuff the old tile surface with sandpaper to provide a better grip for the new adhesive or mortar. Before you begin tiling, wash the floor with a commercial detergent such as TSP (tri-sodium phosphate) to remove dirt, soap film, and other contaminants that could prevent adhesion.
Tiling over a mortar (also called “thinset”) base is preferred by professionals because it prepares the original floor with a solid, level base that results in an extremely durable finished floor. Working with mortar is more difficult, however, and requires experience to properly mix and level it on the floor.
Tile mastic, or thinset, is a premixed adhesive that is easy to use right out of the can, and it bonds well to almost any surface. It is commonly used directly on plywood or on cement board. Cement board is a highly stable, cement-based, sheet material typically reinforced with fiberglass. It is installed with special screws recommended by the manufacturer. If you tile on plywood, a double layer of plywood with overlapped seams is recommended. The bottom layer should be a minimum of 3/4-inch thick. Use screws to attach this layer to the floor structure. The top layer can be 1/4-inch plywood, or a commercial substrate made specifically for flooring underlayment. This layer also must be adequately attached with screws, or according to the product directions.
LAYING THE PATTERN
Start by measuring the floor, then snap a chalk line down the middle of the floor’s longest dimension. Mark a second line across the middle of the floor’s shortest dimension. By dividing the room into quadrants, you can begin tiling from the center point using your lines as a guide.
Before you apply mastic and install the tiles, do a dry run to check your layout and make any necessary adjustments. Lay out enough tiles along your lines to reach the walls in each direction. Use plastic spacers between the tiles. Your tile supplier can recommend the correct size spacers for your tiles.
If the rows end with full tiles close to the walls, you may be able to avoid making any cuts by adjusting the spacing slightly.
If the end tiles have to be cut to fit, do not use pieces that are too short — they may have a poor appearance or will not adequately bond to the subfloor, especially in doorways where there is more foot traffic. This often can be resolved by cutting the tiles at each end of the row by an equal amount. Adjust the tiles on your centerline so that you end with at least a half-tile at entryways and other high-traffic areas. Or, start with a full tile at the main entry and let the short tiles fall at an end wall where they will be less noticeable and not subject to foot traffic.
MAKE CUTS
Tiles can be cut with a manual snap cutter or with a power wet saw. A snap cutter is adequate for smaller jobs and thin tiles. It has a scoring wheel that is used to first etch a cut line and a lever press to snap-cut the tile along this line. Because snap cutters leave a jagged edge along the break, a carborundum file or stone is used when the edges need to be smooth or dressed. A wet saw (which may be rented) uses a water-cooled diamond blade to make perfectly smooth cuts in all types and sizes of tiles, including thick paving tiles, hard ceramic tiles, delicate glass or porcelain tiles, and natural stone tiles.
If you have calculated your layout correctly, you can often cut all of the required tiles for row ends and corners before you begin setting the tiles in the mastic. Compound cuts and tiles that must be cut to fit while you’re working, can be measured and shaped as they are required.
APPLY MASTIC
Use a notched trowel to spread the adhesive over the floor. For mosaics and smaller tiles (less than 8 inches), use a trowel with 1/4-inch notches. Larger tiles require a 3/8- to 1/2-inch notch, depending on the size and thickness of the tile. Start at your layout lines and press the mastic against the floor for a good bond, then set the trowel on edge and rake the mastic to create ridges equal to the notch depth. Be sure your layout lines remain visible.
Work in an area about 3 to 4 feet square to prevent the mastic from drying as you cut and fit the tiles as needed. Some mastics have strong, noxious fumes and may be volatile, so be sure to extinguish any pilot lights and provide adequate ventilation to the work area.
LAY THE TILE
Begin at the intersection of your layout lines and carefully set the tiles into the adhesive. Work from the centerlines out toward the walls, and plan your installation so you will not have to step on or disturb any of the tiles as you proceed. It helps to have two people when tiling — one to concentrate on laying and bedding the tiles, while the other provides a constant supply of loose tiles and makes cuts or retrieves tools as needed.
Use a rubber mallet, or hammer and wood block, to gently but firmly tap and bed each tile into the mastic. Do not press or shift the tiles around to avoid having the mastic squeeze up into the grout lines between the tiles. If a tile cracks when tapped, remove the pieces and “butter” the back of the replacement tile with a small amount of mastic before setting it in place.
Place plastic spacers between each tile as you proceed. The mastic will not stick to the spacers, which are easily removed before you begin grouting the joints. Use a 4-foot level, or a smaller level to ensure that the tile edges are aligned and the tiles are level across their surface.
GROUT JOINTS
Allow the tile mastic to set for at least a day before removing the spacers and grouting the joints. Premixed grout is easier to use than bulk grout, and it is available in a wide range of colors to match or contrast with your tiles. Because grout can stain or stick tightly to porous or unsealed tile, your tile distributor may recommend applying a sealer to the tile faces before you begin grouting.
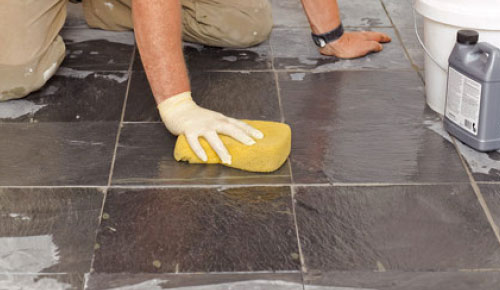
Mix the grout in batches that can be applied within a half-hour or so to prevent it from drying as you work. Use a rubber float to squeeze the grout into the joints. Ensure that the grout completely fills the spaces between the tiles. As you work, clean excess grout off the tile faces with a coarse cloth or damp sponge, but be careful not to wet the grout, which will weaken it. Wipe diagonally across the joints to avoid pulling the still-fresh grout out of the grooves.
After the grout has dried thoroughly, use a release agent to clean any grout haze from the face of the tiles, then apply a grout sealer according to the product directions.

Please visit sites like YouTube.com for great video demonstrations of each step of the process if necessary.
Feel free to stop into Builder Supply Outlet or the Edge Showroom with any home improvement questions you may have regarding removing, installing, or buying tile — or anything else. We have a huge amount of tile in-stock everyday. Or call us anytime in Broadview, IL at 1-708-343-3900.
You can also make an appointment to meet with one of our Edge designers at no charge by clicking here.


- My account Cart
-
OPEN TO THE PUBLIC | Store Hours and Information708.343.3900 OPEN TO THE PUBLIC Store Hours and Information
- 708.343.3900 Español Schedule Your FREE
Design Consultation