-
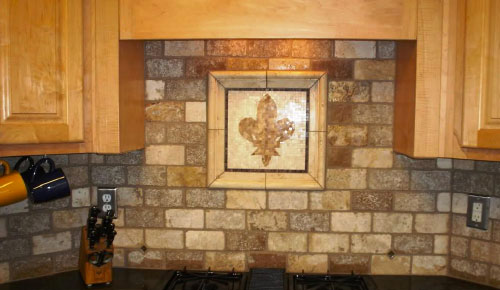
How To Install Kitchen Tile Backsplash
 Share on Facebook
June 23, 2017
It’s actually easier than you think to install new ceramic, porcelain, glass or stone backsplash tiles above your countertop.
And when you do, the new backsplash will instantly brighten up your kitchen.
To complete installation, you’ll need the following tools and materials:
- Tile Spacers
- Notched Trowel
- Wall Tiles
- Grout
- Grout Release Agent
- Grout Sealant
- Tile Adhesive
- Drill/Driver (with mixing attachment)
- Grouting Sponge
- Tile-cutting Hand Tools
- Level
- Grout Float
- Wet Saw
LAYOUT THE BACKSPLASH
Wall tiles are usually thinner and lighter than floor tiles.
Many are made with built-in spacer on their edges, also known as lugs. If your tiles don’t have lugs, ask your tile dealer for the proper size plastic spacers.
By using spacers, this will help maintain the proper gap and prevent the tiles from slipping downward before the adhesive sets up.
The mastic will not adhere to the spacers. They can easily be removed and discarded before the joints are filled or when grouted.
The backsplash space between a countertop and wall cabinets typically can be filled with two or three horizontal tile rows.
Because tiles create a grid pattern, choose tiles that fit this space. Wall installations look better when they are vertically even and symmetrical from end to end. Bull-nose or edge tiles of various sizes are also available to finish edges, fill gaps, or to avoid having to cut tiles to fit.
Check the countertop and make sure it’s level. If it’s not level, stand a tile at the lowest spot and mark a level line on the wall at the tile’s top. This is your starting point. Use a standard level or laser level to extend this reference line across the wall and around the entire area that’s being tiled. The tops of all the tiles in the bottom row must meet this line or be cut (from the bottom) to line up with the mark. Tiles installed above this line will not require cutting. If you’re tiling all the way up to the cabinets, place the cut tiles or uneven gap just below the cabinets where it won’t be as noticeable.
To ensure a symmetrical layout from end-to-end, measure and mark the center point of each area being tiled. Before you apply mastic and begin tiling, do a dry run by lining up the edge of one tile with the center mark. Next, place tiles side by side to determine how many tiles will be needed and the width of the end pieces. Include spacers between each tile.
If the end pieces will be very small or odd-sized, you may be able to adjust the spacing slightly to avoid having to cut the ends. If this does not work, repeat the dry run, but place the first tile directly over the center mark, which may enable you to cut equal-size end pieces, often from a single tile. If one side of your tile work will have exposed edges, use whole tiles near this edge and cut only the tiles that end at the wall.
If you’re tiling over painted drywall, use a course-grit sanding sponge to rough up the surface. This will help the mastic adhere better to the wall. Wipe off the dust and debris with a damp rag.
CUT THE TILES
While you’re dry-fitting the tiles, before you apply the mastic, make your bottom row and end cuts. Top-row tiles, sized to fit under cabinets, and special cuts are better made just as you are about to install them.
You can use a manual snap cutter for most ceramic or porcelain tile. The cut edges will be rough, so use a sanding stone to smooth them over. For glass or larger size tile, using a water-cooled, power wet saw will produce smoother, more precise cuts. Cut tiles as needed for electrical outlets, pipes, or other obstacles. You can also use a power drill with a tile-hole saw, an angle grinder with a diamond-grit blade, or a hacksaw or file with a carborundum blade.
APPLY MASTIC
Wall tile adhesive comes pre-mixed or in a powder form. If you’re using the powder, mix it with water until it’s the consistency of peanut butter. Apply it with a notched trowel sized to your tile. For most wall tiles, the trowel will have 1/4” or 3/8” notches. Use the flat side of the trowel to spread the mastic onto the wall, starting at the center mark and working up to the horizontal reference line. Then, turn the trowel around and hold it at a 45-degree angle to rake the mastic with the notched side, creating ridges of the proper depth. Tile adhesive dries rather quickly, so spread only as much adhesive as you can tile in about 15 minutes.
INSTALL TILE
If you have a vertical border row, start there. Put a spacer at the bottom to allow room for caulking. If you don’t have a border, being with the bottom row at the center mark, press the tiles firmly into place, placing spacers between each tile.
Avoid squeezing the mastic into the joints. If corner pieces must be cut to fit, don’t set them in place yet.
When the first row of tiles is complete, start the second row. Work upward one complete row at a time. Spacers are especially important between horizontal rows to maintain an even grout space between the tiles. Periodically check your work to ensure that the tiles are securely bonded to the wall, and use a straightedge to make sure the rows are level.
If you’re installing sheets of smaller tile with mesh backing, use a utility knife to cut the sheet to size. Press it firmly with your hands, then use a clean grout float to tap it onto the adhesive.
After you’ve completed two or three rows, measure and cut corner tiles to size and set them in place with the cut edges facing into the corners. When you reach the top row, cut the tiles as necessary to fit around the cabinets. For smaller cuts on ceramic, porcelain or stone tile, you can use a tile nipper to round corners or make small cuts.
If you are tiling a small area where you can’t fit the trowel, apply the adhesive directly to the back of the tile — known as “back buttering.”
GROUT AND REPLACE RECEPTACLES
Before applying grout, allow the tile adhesive to set for 24 hours or as the manufacturer recommends. Unsanded grout is usually specified for wall installations, glazed tiles, and tile with narrow grout lines. Pre-mixed grout is available in a wide variety of colors to match or contrast with your tiles. To prevent grout from staining or sticking to porous natural tiles like stone and terra cotta, check with your tile distributor to see if they require a commercial sealer before you apply grout.
Use a mixing attachment on a variable-speed drill, set at low speed, to mix the grout to the consistency of peanut butter.
Grout can dry out, so mix only what you will be using within 20—25 minutes.
Wipe down all the tile with a gently wet sponge to make sure there is no dust on them before you grout. Remove the plastic spacers. Apply grout with a rubber float working diagonally across the tile. Hold the float at a 45-degree angle as you work the grout into the seams. Don’t grout the bottom seam where the tile meets the countertop – instead use caulk in that seam. Use the float to take off any excess grout and then allow the grout to set for 10 minutes.
Use a damp sponge to wipe off the excess. Rinse and wring out the sponge frequently. Do not wet the grout, it will weaken the bond. Wipe at a 45-degree angle across the grout lines to avoid raking the grout out of the joints. After the grout has dried, clean any grout haze off the face of the tiles with a commercial release agent. Wait a couple days then apply a grout sealant.
Complete the installation by replacing the wall receptacles. You’ll probably need longer attachment screws to compensate for the thickness of the tiles.
Hopefully this brief article was helpful teaching you how to install kitchen tile backsplash.
And of course, Builder Supply Outlet and the Edge Showroom carry the top kitchen cabinet brands including Waypoint, Shiloh, Aspect, Eclipse, Prior Creek, MidContinent, and Bertch. Stop in anytime to learn more about kitchen cabinets or make an appointment and meet with an Edge Kitchen and Bath Designer absolutely FREE by clicking here.

Feel free to stop into Builder Supply Outlet or the Edge Showroom with any home improvement questions you may have regarding cabinet hardware, bathroom vanity sinks, tops, remodeling, tile, backsplash, cleaning, sealing, grout, windows, kitchen cabinets, construction, contractors, designing/installing a new kitchen or bathroom — or anything else. We can help you through the entire design and installation process from A-Z. Or call us anytime in Broadview, IL at 1-708-343-3900. You can also make an appointment to meet with one of our Edge Kitchen and Bathroom designers at no charge by clicking here.


- My account Cart
-
OPEN TO THE PUBLIC | Store Hours and Information708.343.3900 OPEN TO THE PUBLIC Store Hours and Information
- 708.343.3900 Español Schedule Your FREE
Design Consultation